Follow Softlite.io on Youtube https://www.youtube.com/@softlitedotio
Litemove Editor Builder integrated deeply GSAP Library serves as the platform where users generate animations on webpages. It encompasses three primary components: the Preview, Editing Timeline and Control Panel. Within each of these components, users have the flexibility to expand and modify inner sections based on their preferences.
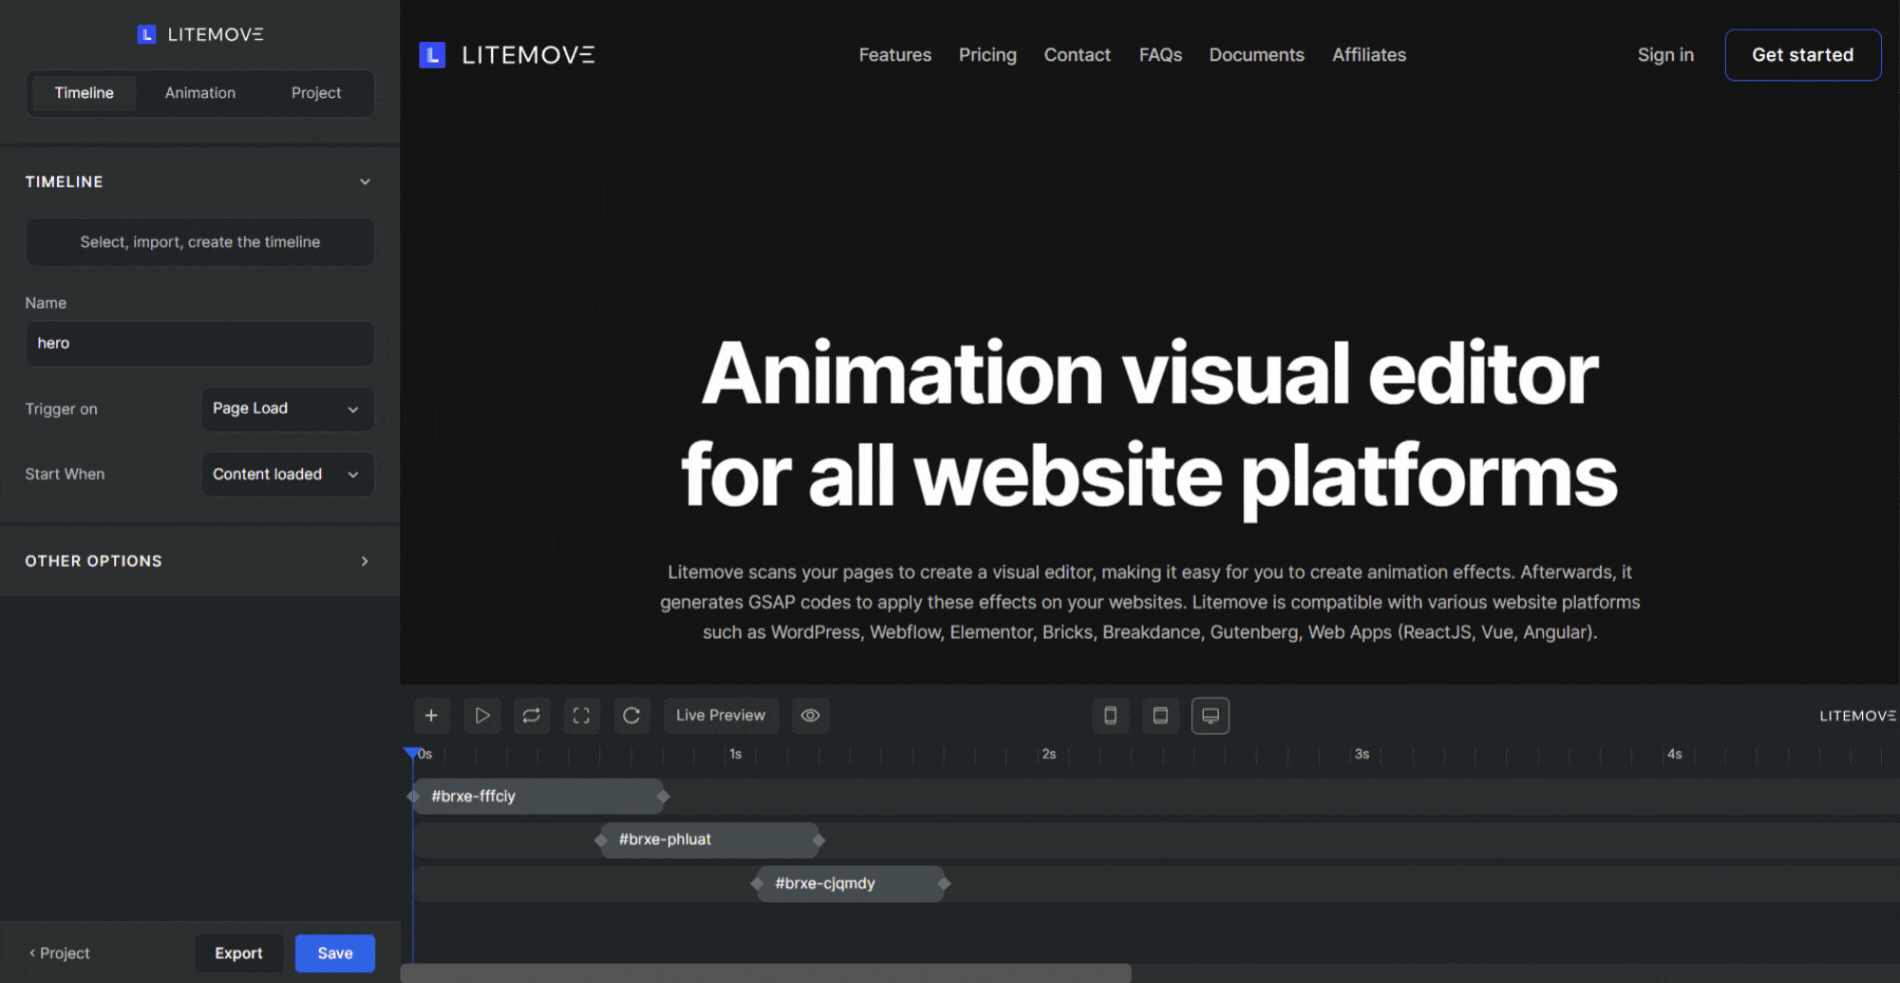
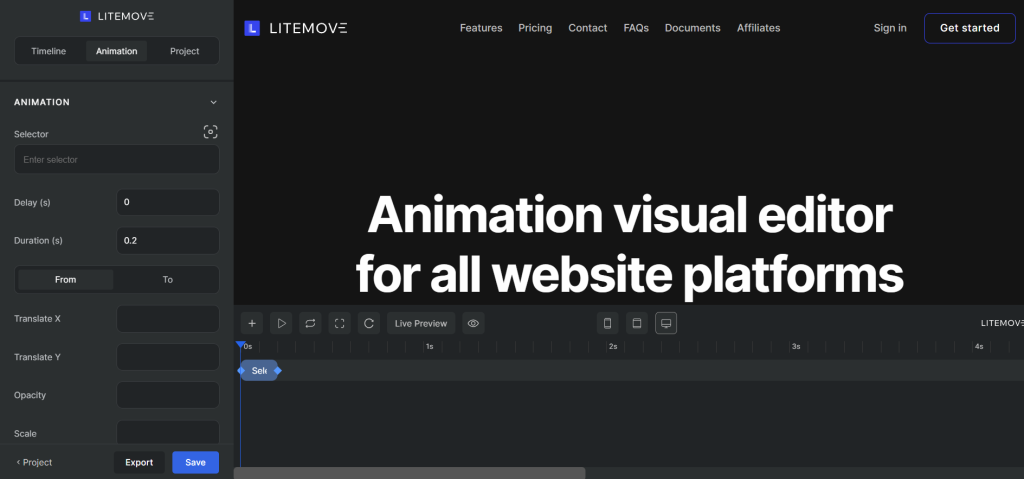
Litemove Structure
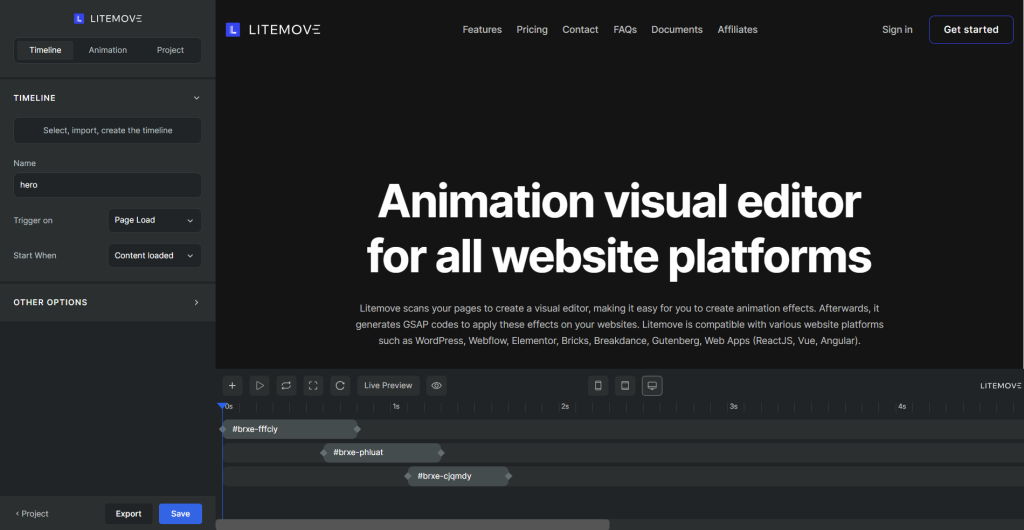
Litemove Preview
The Preview section showcases a real-time preview of the page (at a time adding a page to your project) under editing. It is dynamically rendered by a JavaScript engine, typically without server-side loading. Essentially, this is the space where you can observe the anticipated appearance of the site.
Depending on Trigger Options, the Preview can be extended and correspondingly added inner area elements
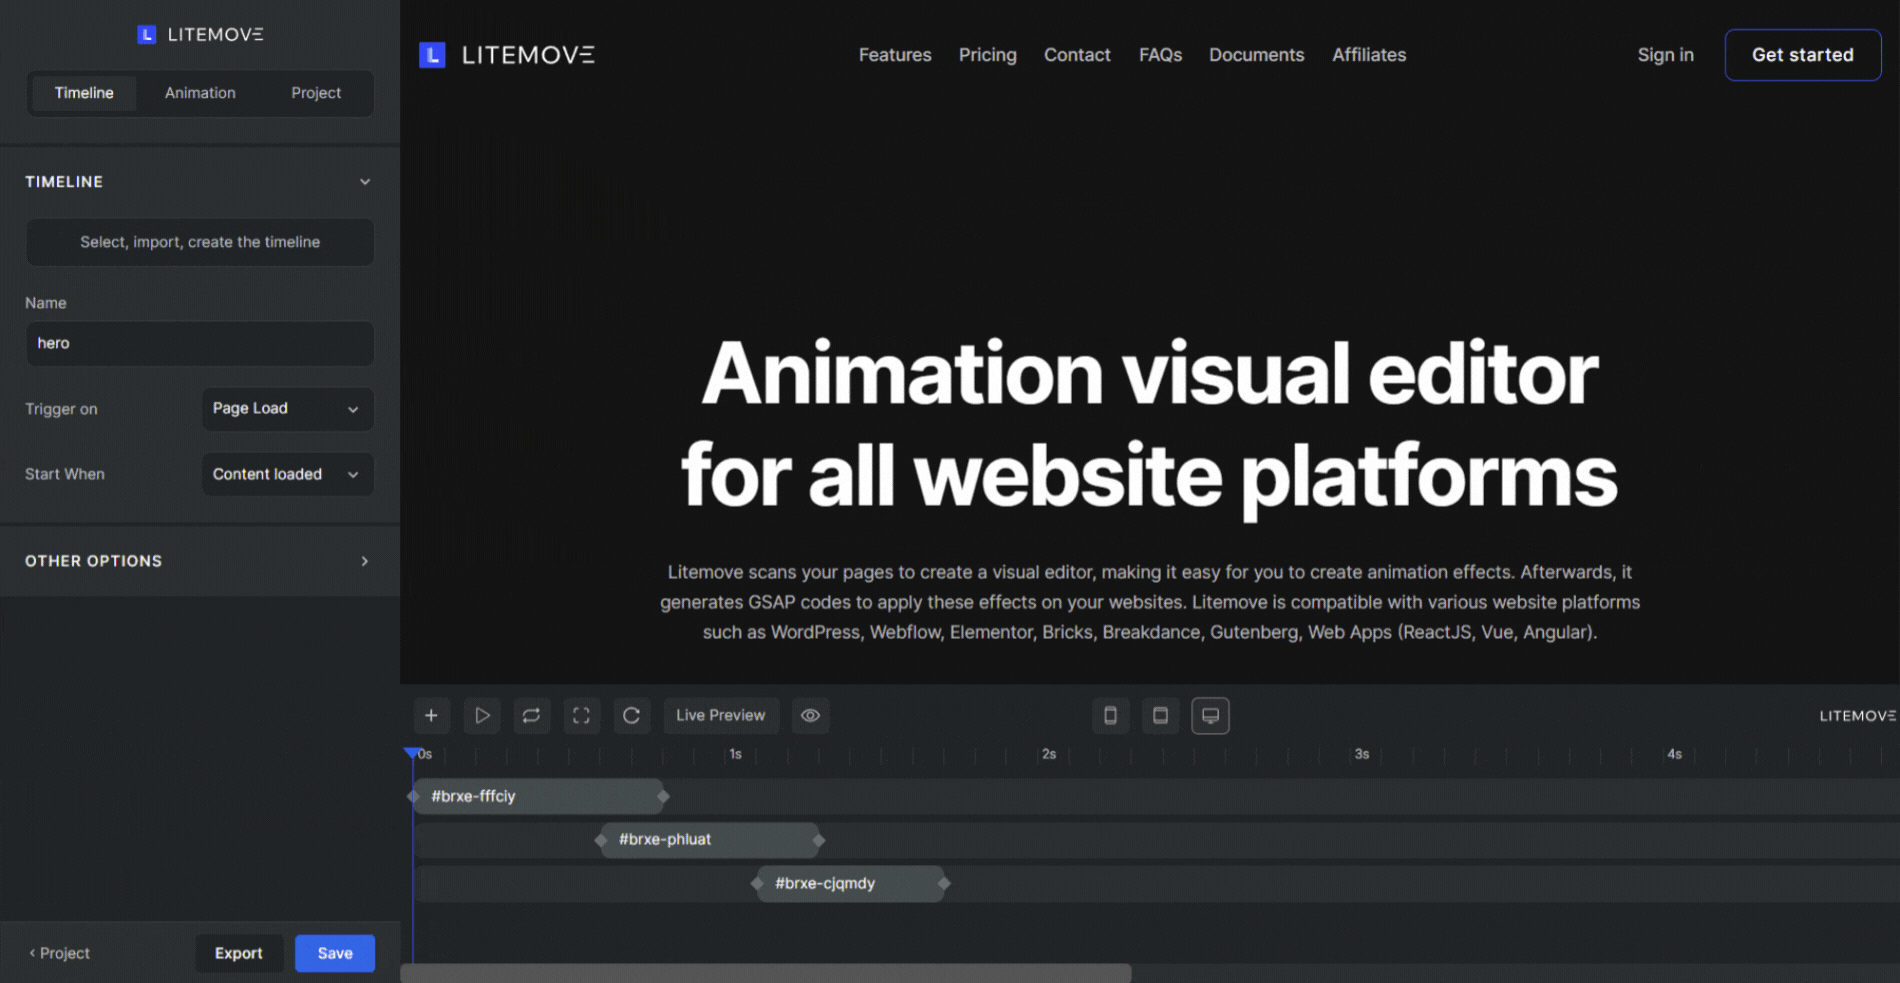
Editing Timeline
At the Editing Timeline (also known as the “Timeline”), you can easily customize the time or position of animations on multiple responsive devices by clicking, dragging, and dropping them.
In the top line, there are a bunch of action icons, explained below:
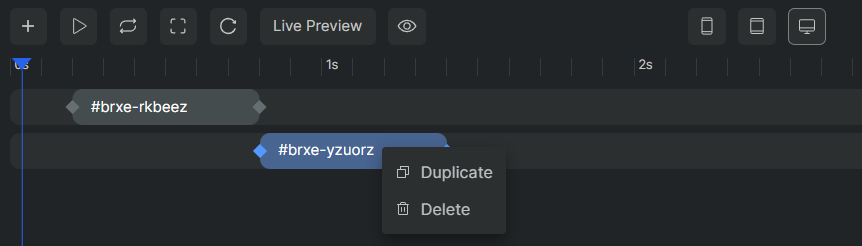
By right-clicking on the animation, you can reveal the context menu, which provides options to delete or duplicate the animation.
Litemove Control Panel
By default, The control panel displays on the left of your screen and functions as an editing dashboard, serving as the central area where users can configure all aspects of animations. It consists of three control tabs: Timeline, Animation, and Project.
Timeline Control Tab
When creating your first Editing Timeline, a Control Panel instantly displays on the left of your screen by default.
You can configure the parameters of Timeline by a Timeline Control Tab in this Control Panel.
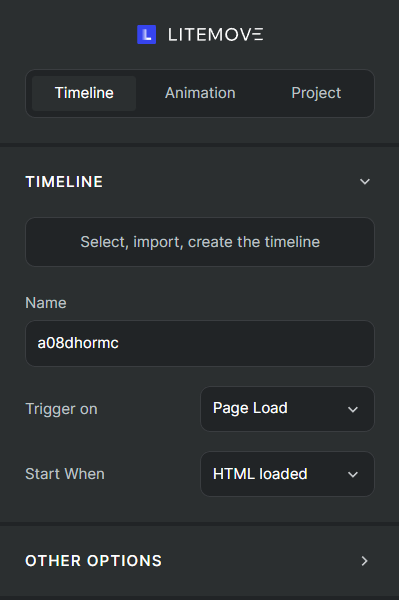
In the first row, you can select a specific Timeline from your list or import/create a new one.
To the next row, a box displays the name of the Timeline.
Trigger on Select the trigger that will start the animation, and it will be applied to this entire timeline.There are four options as below:
- Page Load: Animations start immediately after page loading
- Page Exit: It animates before moving you to the new page you’ve clicked on.
- Scroll: Animations start when the user scrolls down/up the elements
- Click: Animations start when the user clicks the elements
- Hover: Animations start when the user hovers over the elements
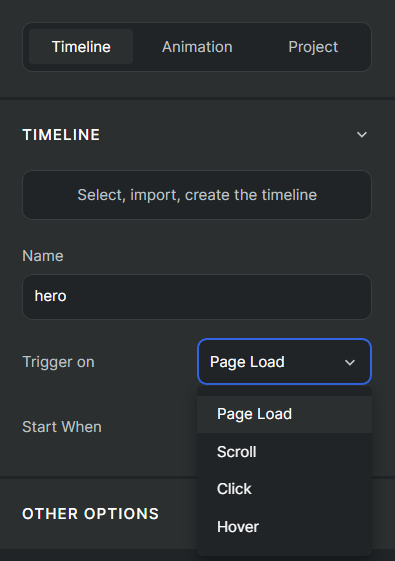
Each trigger has its own sub-settings. Depending on Trigger actions, the settings of the Timeline Control Tab appear correspondingly.
Animation Control Tab
Similarly, all the animations in Timeline will be configured to Animation Control Tab in Control Panel.
Within this panel, you have control over the properties to animate for each individual animation in your timeline.
For more details, you can reach to Animation Control Tab
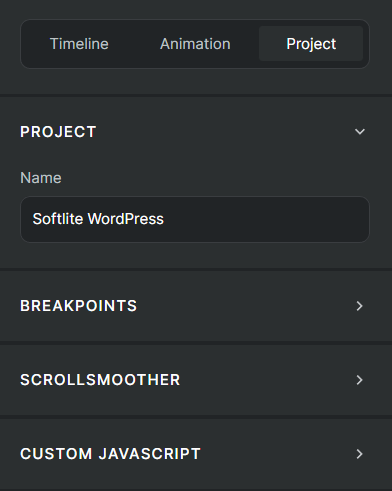
Project Control Tab
A Control Tab to configure other Projects’ actions
- Breakpoints: Define the parameter widths for various devices.
- Reset Timelines: Fine-tune animation effects for different device sizes.
- ScrollSmoother: Enhance animation effects in conjunction with scrolling triggers.
- Custom Javascript: Customize JavaScript in this section.