If you are familiar with WordPress, you can skip this article.
Livemove is a standalone animation builder with a visual editor that is compatible with multiple website platforms. In fact, you can easily customize the animation effects of elements on your Site without coding for any platform.
It works with WordPress, Webflow, ReactJS, and any page that requires logging in.
Step by Step to create your first animation
In this tutorial, we provide a step-by-step guide on using Litemove across different platforms (Saas method) . If you are proficient in WordPress, you can simply install our plugin and bypass this tutorial.
Create a project
First, register an account and log in at Softlite Website: https://softlite.io/litemove/
After that, you will be directed to https://litemove.softlite.io/projects/– The Projects Dashboard.
You can immediately edit elements’ animations without requiring additional plugins for your site

-> Click on “Add new project” to initiate your first project
A popup appears to require “Project Name” and your target “Website URL”
Enter the project name and the URL of your target website
Note: Each project can contain multiple distinct pages, each associated with a parent website URL. If you want to apply Litemove to another website, you’ll need to create a new project.
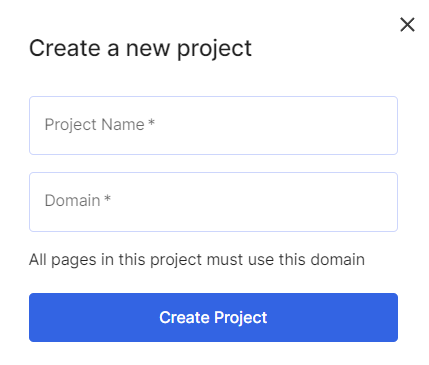
For instance: we will make a demo with website https://softlite.io/
-> Click on “Create Project” to proceed

Add a target page to Project
In the next step, Click on the added Project
A dashboard will display the pages of your target site. You’ll need to manually add pages to bring them to the Editor.
There are two ways to achieve this
Enter input URL
You can directly embed the page URL into the provided box (top-right of your screen)
This is the most popular and quickest way to add a target public page into your project

For instance, we embed a page URL https://softlite.io/litemove-demo/
Then Click on “Add Page”

Immediately, an item display on this project dashboard

Use Litemove Extension
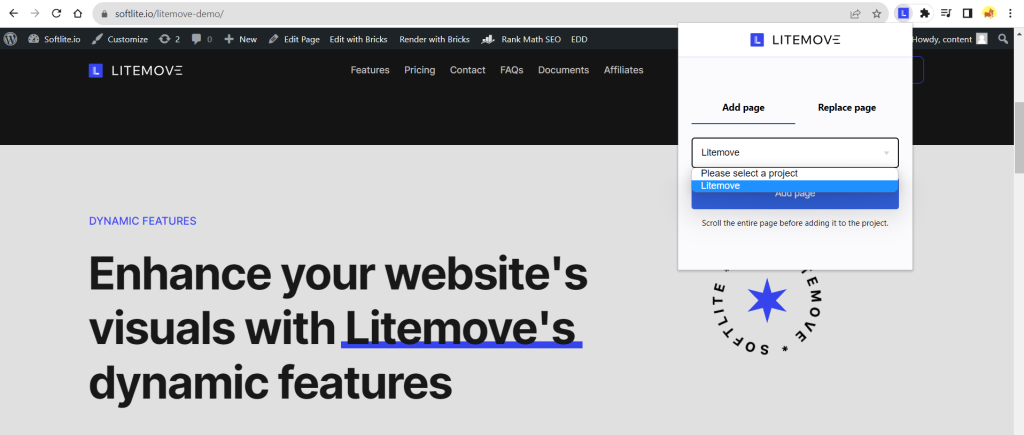
Alternatively, we’ve developed a Litemove Extension for the Chrome browser, which you can consider setting up.
In some cases, you need to use this extension to add pages
- Private Pages
- Pages made by React, Angular, Vue, etc
- Pages require to log in

For example, you can use it in your WordPress dashboard or any web dashboard
Go to your target page, it’s better when scrolling down to the end of page (to make sure all of your elements on this page are already loaded)
Click on the extension icon, choose the corresponding project, and then click on “Add Page.”
Configure Timelines
Returning to the current Project dashboard, you’ll find the added page there. Click on “View Page”
You have two options for the Timeline: you can import an existing one or create a new one.

When creating a new Timeline, it redirects to Litemove Editor as below
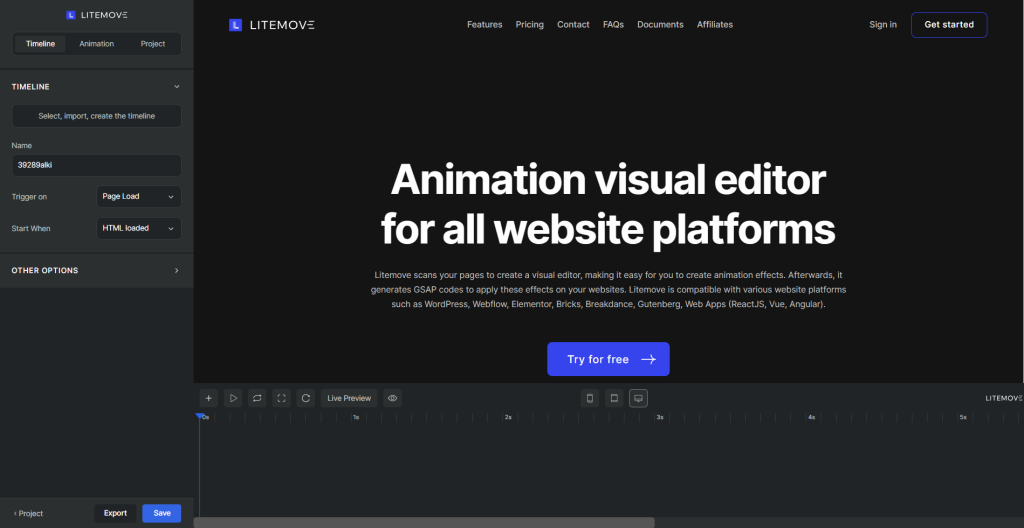
→ Start configuring your Timeline Tab Control
Depending on Trigger actions, the settings of the Timeline Control Tab appear correspondingly.
There are four options as below:
Configure Animations
Click on the “plus icon” in Editing Timeline to add your first animation.
On the left of your screen, open the Animation Control Tab in Control Panel
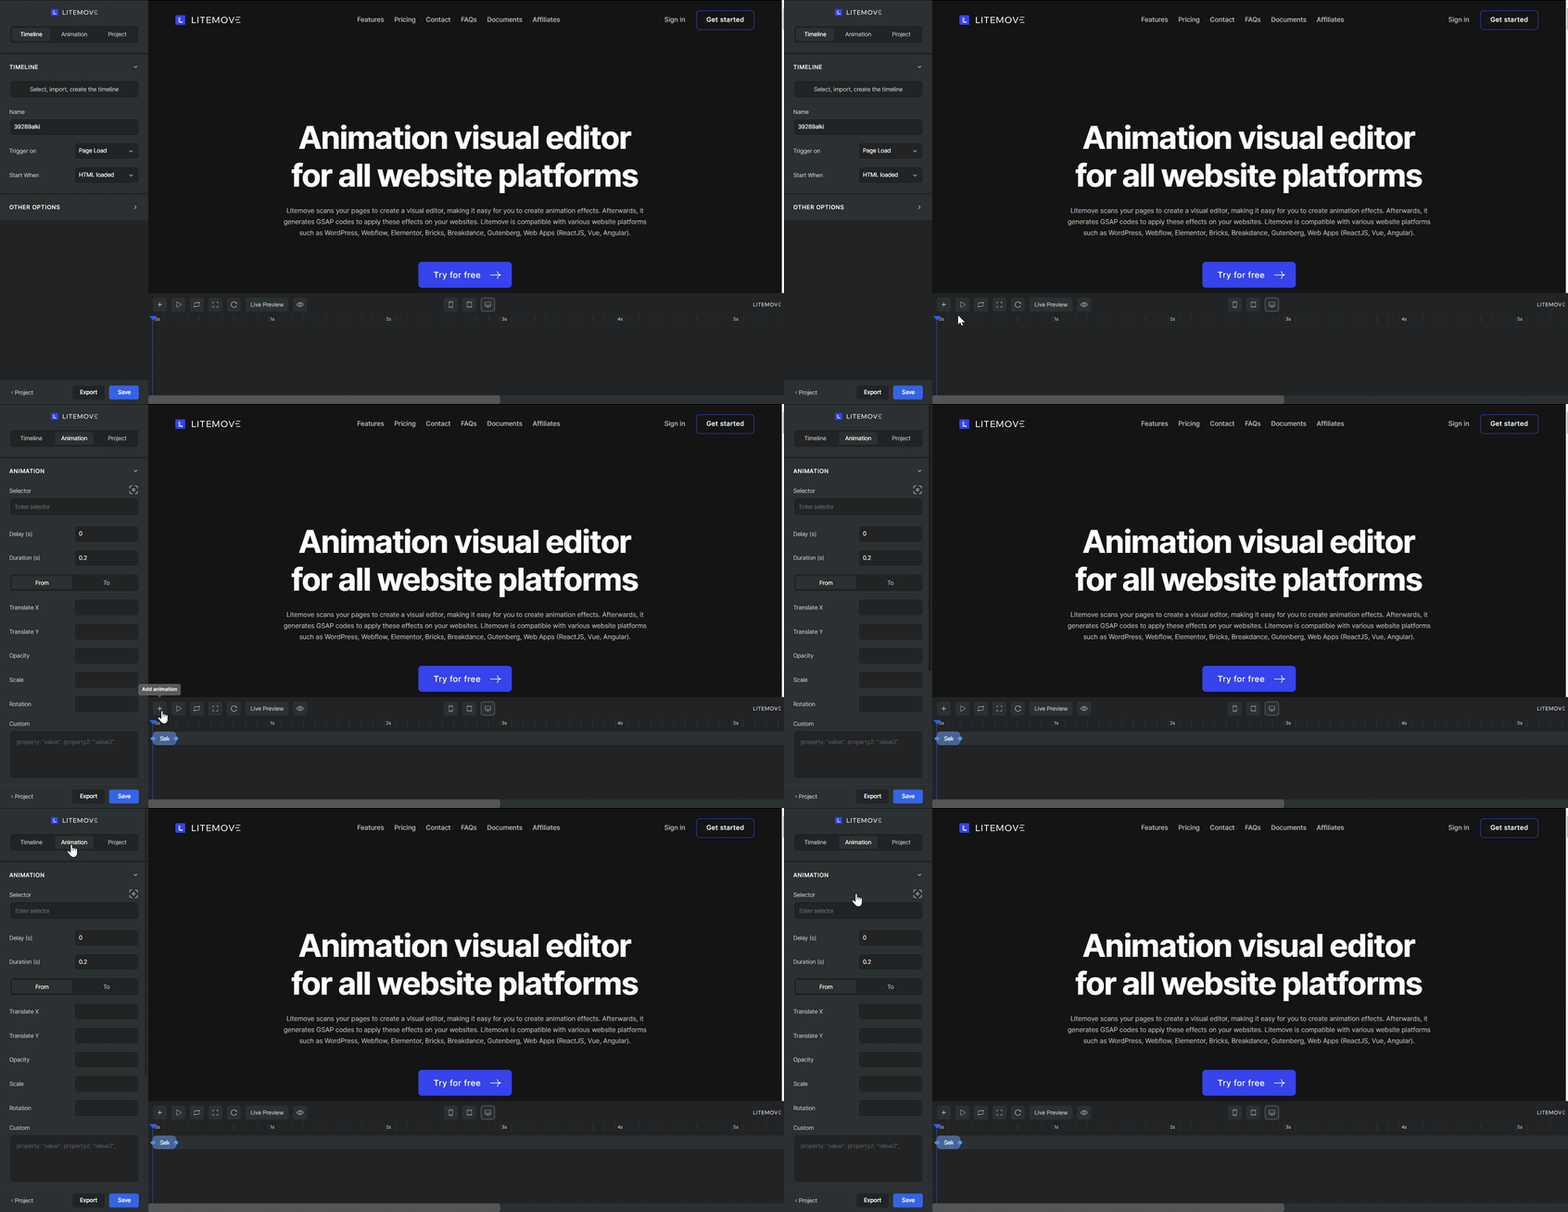
→ Start configuring your animation
Find out more: Animation Control Tab Panel
Export
After all, save your animation editor page project
-> Click on “Export”
Export to Javascript
Upon clicking, all animation adjustments made to your current page project will be automatically rendered to JavaScript coding.
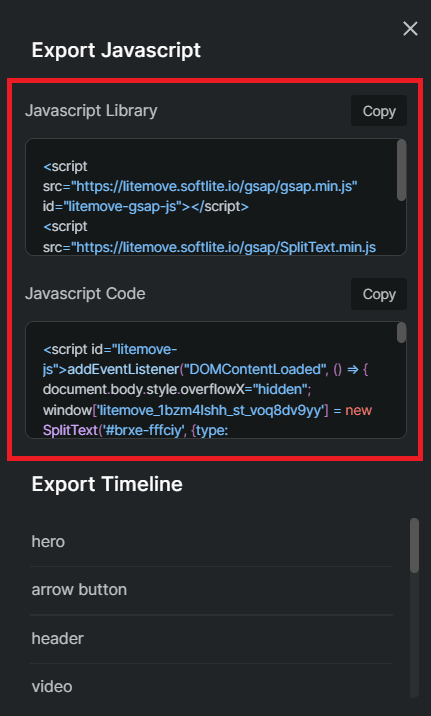
You can embed JavaScript Library and JavaScript Code in sequence to your Page Builder Settings or Website Platform’s default Settings
Export Timeline
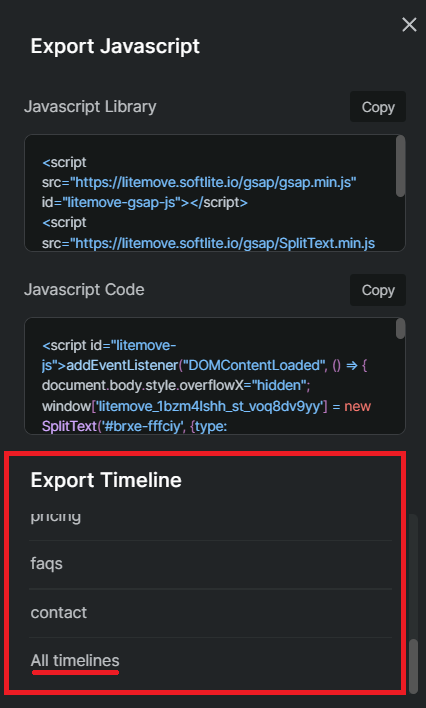
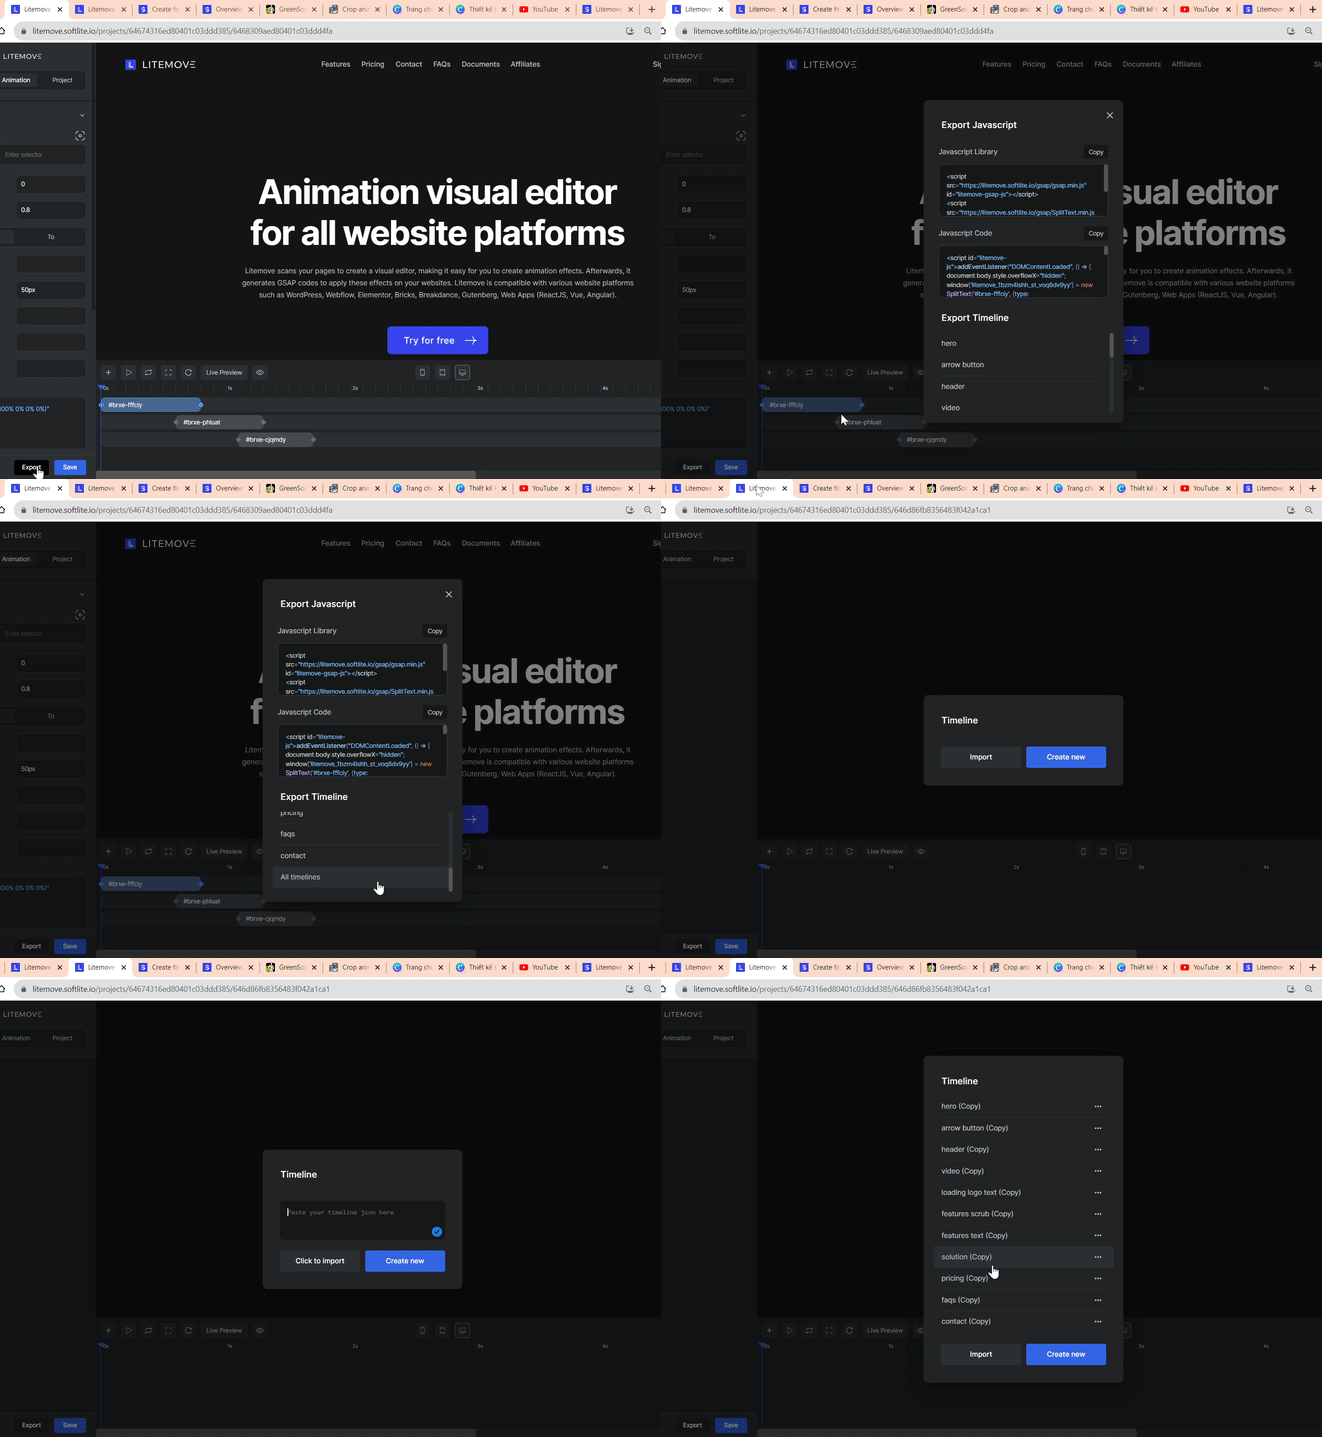
On the other hand, you can export your existing Timeline to Import new projects.
You are able to choose to export a single Timeline or All Timelines
Import Timeline to new projects
 Skip to main content
Skip to footer